How the pipeline works
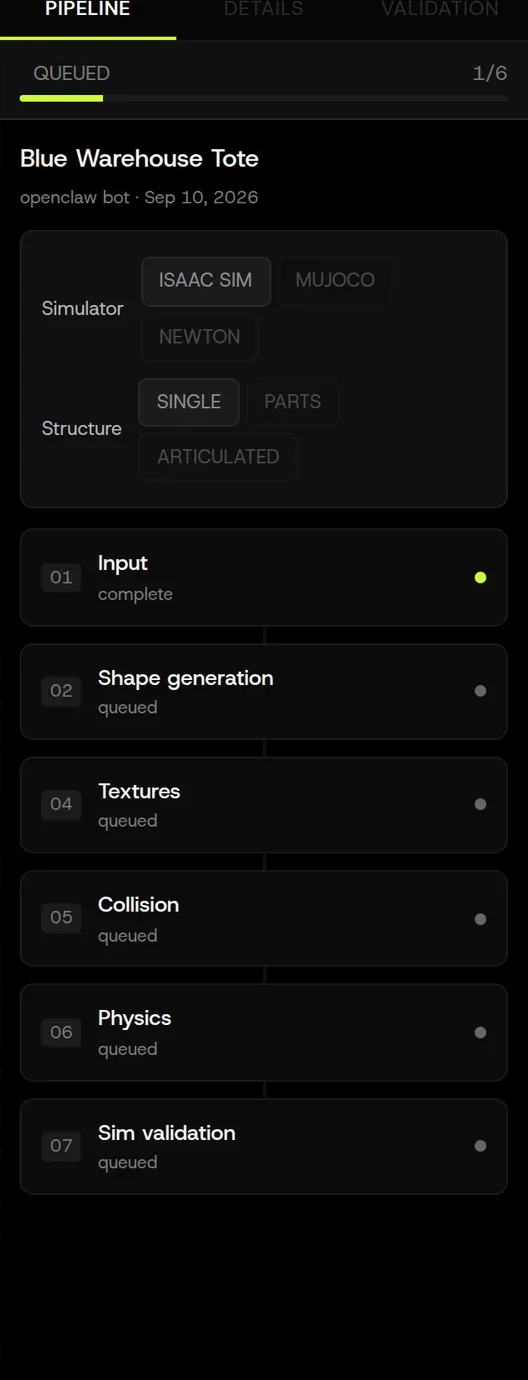
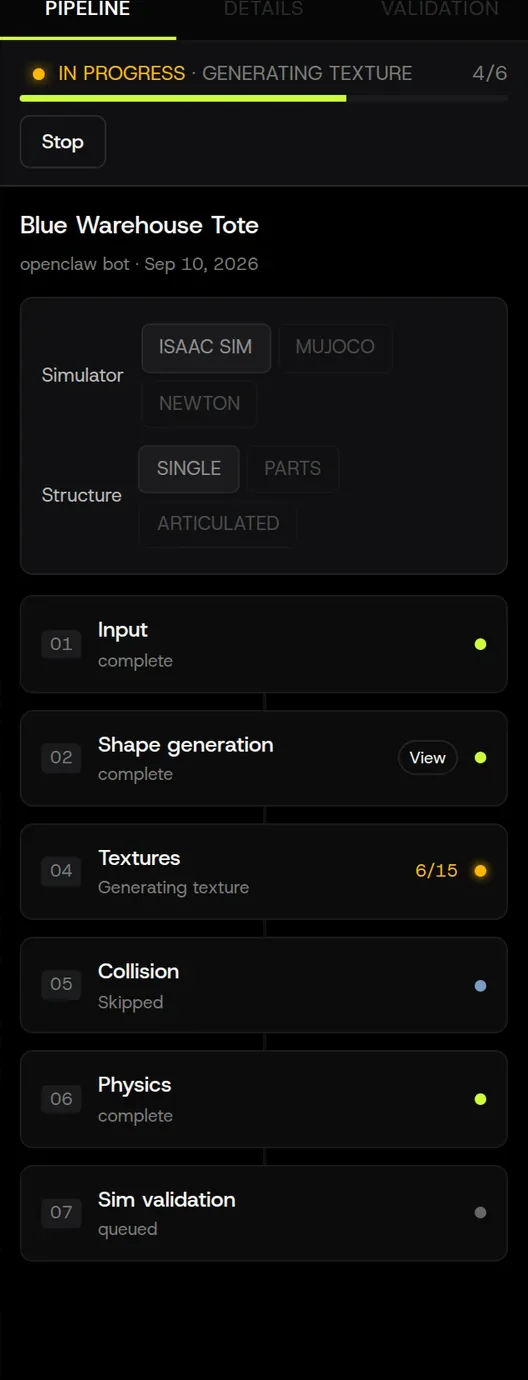
Every asset, whatever you started from, goes through the same pipeline. The Pipeline tab on the right of the viewer shows it live: Simulator and Structure at the top, then the stage cards, which fill in as the build runs. Stages that don’t apply to your asset are shown as Skipped rather than hidden, so you always see the whole lifecycle.
Global settings
Section titled “Global settings”These sit at the top of the tab because they change what several stages do. The Agent sets them from your description; you can change them before confirming. After the build, each stage card expands to show the exact settings it used.
| Setting | Options | What it changes |
|---|---|---|
| Simulator | Isaac Sim, MuJoCo, Newton | Which engine validates the asset and which package is exported. Also gates some collision options (SDF is Isaac-only). Simulators |
| Behavior | Single object, Parts, Articulated | Whether segmentation runs and whether joints are created. Single: one rigid body. Parts: separate rigid bodies, fixed together. Articulated: parts with real joints. |
| Physics type | Rigid body, Soft body | Rigid is the default and what most assets need. Available body types depend on the selected simulator and workflow; confirm support for your task before generating. |
| Up direction | Y, Z | Which axis is “up” in the export. Match your simulator scene convention. |
| Units | m, cm, mm | Scale interpretation for CAD/mesh input and the unit of the export. |
01 · Input
Section titled “01 · Input”What you gave the pipeline. Display-only; it exists so you can verify what was actually submitted.
- Text: prompt, any reference images, and the Variants count (text only, 1 to 4).
- Image: the uploaded photo(s), and your description.
- CAD: filename, size, detected units, and the preview.
02 · Shape generation
Section titled “02 · Shape generation”Skipped for CAD/mesh input. Turns the selected reference image into a 3D mesh, then cleans it.
| Setting | Options | Notes |
|---|---|---|
| Shape model | Options offered for your build | Review the available options and estimated cost before generating. |
| Repair mesh | on / off (default on) | Fill holes, fix normals, remove duplicate faces. Leave on. |
| Quads | on / off (default off) | Output quad-dominant topology instead of triangles. Useful if you’ll edit the mesh in a DCC tool; not needed for simulation. |
| Auto scale | on / off (default on) | Scale the mesh to the size the Agent inferred or you specified. Turn off only if your reference is already at scale. |
| Decimation | Automatic quality presets | Controls how much geometry is reduced before delivery. Use the default unless your workflow requires a specific output-size target. |
| Mesh density | Low, Medium, High | Tessellation density before decimation. Higher captures finer detail and costs more. |
| Triangle count | Automatic quality presets | Controls the final visual mesh budget. Automatic selection is based on the object and requested quality. |
03 · Segmentation
Section titled “03 · Segmentation”Runs when Behavior is Parts or Articulated; skipped for Single object. Splits the mesh into parts. For CAD it starts from the file’s part structure; for generated and scanned meshes it analyses geometry and your description (“the lid hinges at the back”).
Output: a part hierarchy you can see in the viewer’s Parts view. For Articulated assets, inspect the delivered joint types, axes, and limits in the viewer.
Use the segmentation controls available in the viewer for your asset; availability depends on the workflow.
04 · Textures
Section titled “04 · Textures”Paints PBR materials: base color, roughness, metallic, and normal maps, with clean UVs.
| Setting | Options | Notes |
|---|---|---|
| Apply textures | on / off | CAD only. Off keeps the materials in your file. Text and Image inputs always get textures. |
| Replace glass | on / off (default on) | Detect see-through parts (windows, lenses, bottles) and give them a glass material instead of an opaque one. |
| Texture model | Auto | Locked for now. |
For CAD input with Apply textures on, the Agent can show a few texture previews and let you pick a direction before painting.
05 · Physics
Section titled “05 · Physics”Adds physical properties to the asset, including mass, center of mass, inertia, friction, and restitution. Review these estimates before using the asset in simulation.
| Setting | Options | Notes |
|---|---|---|
| Solver | Engine-specific | Physics estimation and validation follow the selected simulator. |
Everything else about physics is editable after the build in the Physics panel: material, density, mass, friction, restitution, per part. Editing.
06 · Collision
Section titled “06 · Collision”Builds the shapes the physics engine actually collides with. Visual meshes are too detailed to simulate directly.
| Setting | Options | Notes |
|---|---|---|
| Collision | Low, Medium, High, Extra high, SDF | Low to Extra high control how many convex hulls approximate each part (more hulls, tighter fit, slower sim). SDF (signed distance field) can represent concave features such as hollows and bores; accuracy depends on resolution and simulator support; Isaac Sim only. |
Check the result in the viewer’s Collision view. Hulls that bridge a gap or fill a cavity are the most common thing to fix; raising the level or switching to SDF usually solves it.
07 · Simulation validation
Section titled “07 · Simulation validation”Loads the finished asset into the chosen simulator and checks it behaves: it rests on the ground without jitter or penetration, joints move through their range, mass is sane. Failures here are reported with the check that failed.
| Setting | Options | Notes |
|---|---|---|
| Sim validation | on / off (default on) | Turn off to skip validation and finish faster. The asset is still exported, but not verified. |
| Test scenarios | drop, stack, slide, grasp | Shown for reference; not user-selectable yet. |
What “skipped” means
Section titled “What “skipped” means”A grey stage with a reason (“not used for CAD input”, “Behavior is Single object”) does not apply to this asset and is not charged. It is not an error. Change the input type or Behavior and regenerate if you need it.
Rerunning stages
Section titled “Rerunning stages”Editing a setting marks that stage and everything after it as stale and shows a Re-run from here action. Only the stale stages run again. Stages before the edit, and their outputs, are kept. Details and what each edit costs: Editing an asset after generation.