Palatial Isaac Sim Plugin
The Palatial Isaac Sim Plugin brings Palatial’s asset-generation workflow into NVIDIA Isaac Sim. You can create an asset from reference images, text, or CAD, import an existing Palatial asset, and continue working with the result in the current Isaac Sim Stage.
What you can do
Section titled “What you can do”- Generate an asset from one image.
- Generate an asset from two to four named multiview images.
- Generate an asset from a text prompt.
- Generate an asset from a CAD or 3D model file, with an optional reference image and optional PDF datasheet.
- Import an existing Palatial asset from its dashboard URL.
- Bring the completed asset directly into the current Isaac Sim Stage.
- Load the geometry, materials, joints, and physical properties included in the exported USD. Check the result in your Stage before using it in a simulation.
- Review the inputs and settings before submitting a paid generation. Review does not submit the request; Generate asset does.
Install the plugin
Section titled “Install the plugin”- Download the Windows plugin ZIP from the Palatial website.
- Do not extract the ZIP or use GitHub’s source-code ZIP as an extension package.
- Open your supported version of Isaac Sim.
- Open Window → Extensions.
- Open the Extensions menu and select Import Extension.
- Select the plugin ZIP.
- Search for
palatial.isaac.pluginor Palatial, then enable the extension if it is not enabled automatically. - Open Window → Palatial. If the panel does not appear automatically, use the Window menu.
Set up your Palatial connection
Section titled “Set up your Palatial connection”The plugin needs a Palatial workspace API key to submit generations and retrieve completed assets.
- Open the Set Up section in the Palatial panel.
- Select Open API page to open the dashboard, then create or copy an API key in your workspace settings.
- Paste it into API Key and select Save.
- The row shows API Key: Saved. Use Change API Key to replace it, then Save or Cancel.
The plugin stores the key through Windows Credential Manager. You do not need to paste it each time you open Isaac Sim.
Your API key is workspace-scoped. Use a key from the workspace where you want the generated asset to appear. Never paste an API key into a chat message, screenshot, public issue, or source file.
Generate an asset from images
Section titled “Generate an asset from images”- Expand Create new asset and choose Images under Input type.
- Fill in Asset name and Prompt. The name must be 4–50 characters; describe the object, its size, materials, and moving parts in the prompt.
- Choose Single image for one reference, or Multiview for two to four images of the same object.
- For a single image, select Add in the Image slot. For multiview, add images to the Front, Left, Back, and Right slots, or use Assign up to 4 views and check the mapping. Picking a new set replaces the previous mapping. Use PNG, JPG, or JPEG files; the same file cannot occupy multiple slots.
- Set Object behavior, Mesh density, and Collision quality under Settings. Expand Advanced for texture, mesh quality, and decimation controls.
- Select Review. Check the files and settings, then select Generate asset to submit. Use Go back to make changes first.
- Keep a Stage open. When processing finishes, the plugin downloads the export and references it into that Stage.
For multiview input, use distinct angles of the same object with consistent lighting and scale. Front, back, left, and right views work well. Avoid mixing photos of different versions of an object.
Generate an asset from text
Section titled “Generate an asset from text”- Expand Create new asset and choose Text under Input type.
- Enter Asset name and Prompt. The name must be 4–50 characters, and the prompt is required and limited to 500 characters.
- Select Review, then Generate asset to submit.
- Wait for the completed result to download and import into the current Stage.
Text mode sends only the asset name and prompt. It uploads no image and shows no generation settings; settings selected on the Images or CAD tab do not apply to Text mode.
Generate an asset from CAD
Section titled “Generate an asset from CAD”- Expand Create new asset and choose CAD under Input type.
- Fill in Asset name and Prompt.
- Add one CAD or 3D model file and wait for the input checks to finish.
- Optionally add a Reference image to guide appearance and a PDF Datasheet with specifications. Neither is required. Datasheets are available only in CAD mode.
- Choose Object behavior, Material policy, and Collision quality. Open Advanced to check source units, up axis, geometry optimization, textures, and validation.
- Select Review and inspect the actual upload files, any file adjustments, and the effective settings. Select Generate asset to submit.
- Wait for the completed result to import into the current Stage.
The current plugin accepts:
| Format | File extensions |
|---|---|
| STEP | .step, .stp |
| OBJ | .obj |
| GLB | .glb |
| FBX | .fbx |
| STL | .stl |
| USD | .usd, .usda, .usdc |
IGES, JT, USDZ, GLTF, PLY, DAE, and 3DS are not accepted by this plugin. A format supported elsewhere in Palatial is not necessarily available here.
Use a self-contained model. The plugin does not upload separate material, texture, or USD dependency files. External USD dependencies block submission. For an OBJ with material-file references, the plugin removes those references from the upload copy; it can also trim extra bytes from the end of a GLB. The review identifies these adjustments, and the original source file is unchanged.
Import an existing Palatial asset
Section titled “Import an existing Palatial asset”If the asset already exists in your Palatial dashboard, you can import it without generating it again.
- Open Import existing asset.
- Copy the asset URL from the Palatial dashboard.
- Paste the URL into Asset URL.
- Click Import.
- The plugin downloads the completed result and inserts it into the current Stage.
The asset must be READY, and your API key must have access to it. Use the dashboard asset page URL; shared links, project links, and direct download links are not accepted.
Importing does not start a new generation. Export access can still depend on workspace credits. If the plugin reports insufficient export credits, resolve that in the dashboard before importing again.
Generation settings
Section titled “Generation settings”Settings are specific to the selected input type. The basic Settings are visible below the input; Advanced starts collapsed.
| Input | Settings | Advanced |
|---|---|---|
| Images | Object behavior, Mesh density, Collision quality | Texture size, Texture max res, Mesh quality, Decimation, Strict target/value, Optimize textures |
| CAD | Object behavior, Material policy, Collision quality | Source units, Source up axis, Mesh decimation, Mesh density or Strict target/value, texture controls, Run validation |
| Text | No settings; only Asset name and Prompt are sent | None |
- Object behavior controls whether to generate one solid object, separate rigid parts, or articulation. CAD also offers Keep existing structure.
- Collision quality controls the collision representation, including SDF. Images also offers Extra high; CAD does not.
- Texture size selects 2048, 4096, or 8192 pixels. Optimize textures and Texture max res control output texture reduction. CAD texture controls appear when generating textures.
- Decimation / Mesh decimation controls geometry reduction. Automatic mode uses Mesh density; Strict mode requires a face-count target or a ratio. Choose Disabled for Images or Off for CAD to skip reduction.
- Run validation on CAD requests server-side simulation validation. It does not certify the asset for your specific Isaac Sim scene or task.
Review, generation, and progress
Section titled “Review, generation, and progress”Review shows a read-only summary of the asset, upload files, and effective settings. Use Go back to edit them. Only Generate asset submits the paid create request.
The current plugin does not provide an authoritative final token quote or live token-usage total. Check billing in the Palatial dashboard.
During a run, the primary button changes to Cancel. Closing the Palatial window does not cancel the cloud job. The plugin saves an in-progress task and can resume tracking it after Isaac Sim restarts. A client timeout does not by itself mean the cloud job failed; check the dashboard before starting another generation.
After success, Review keeps the current inputs available for a new review and paid generation. It is not a free regeneration action.
Where the imported asset goes
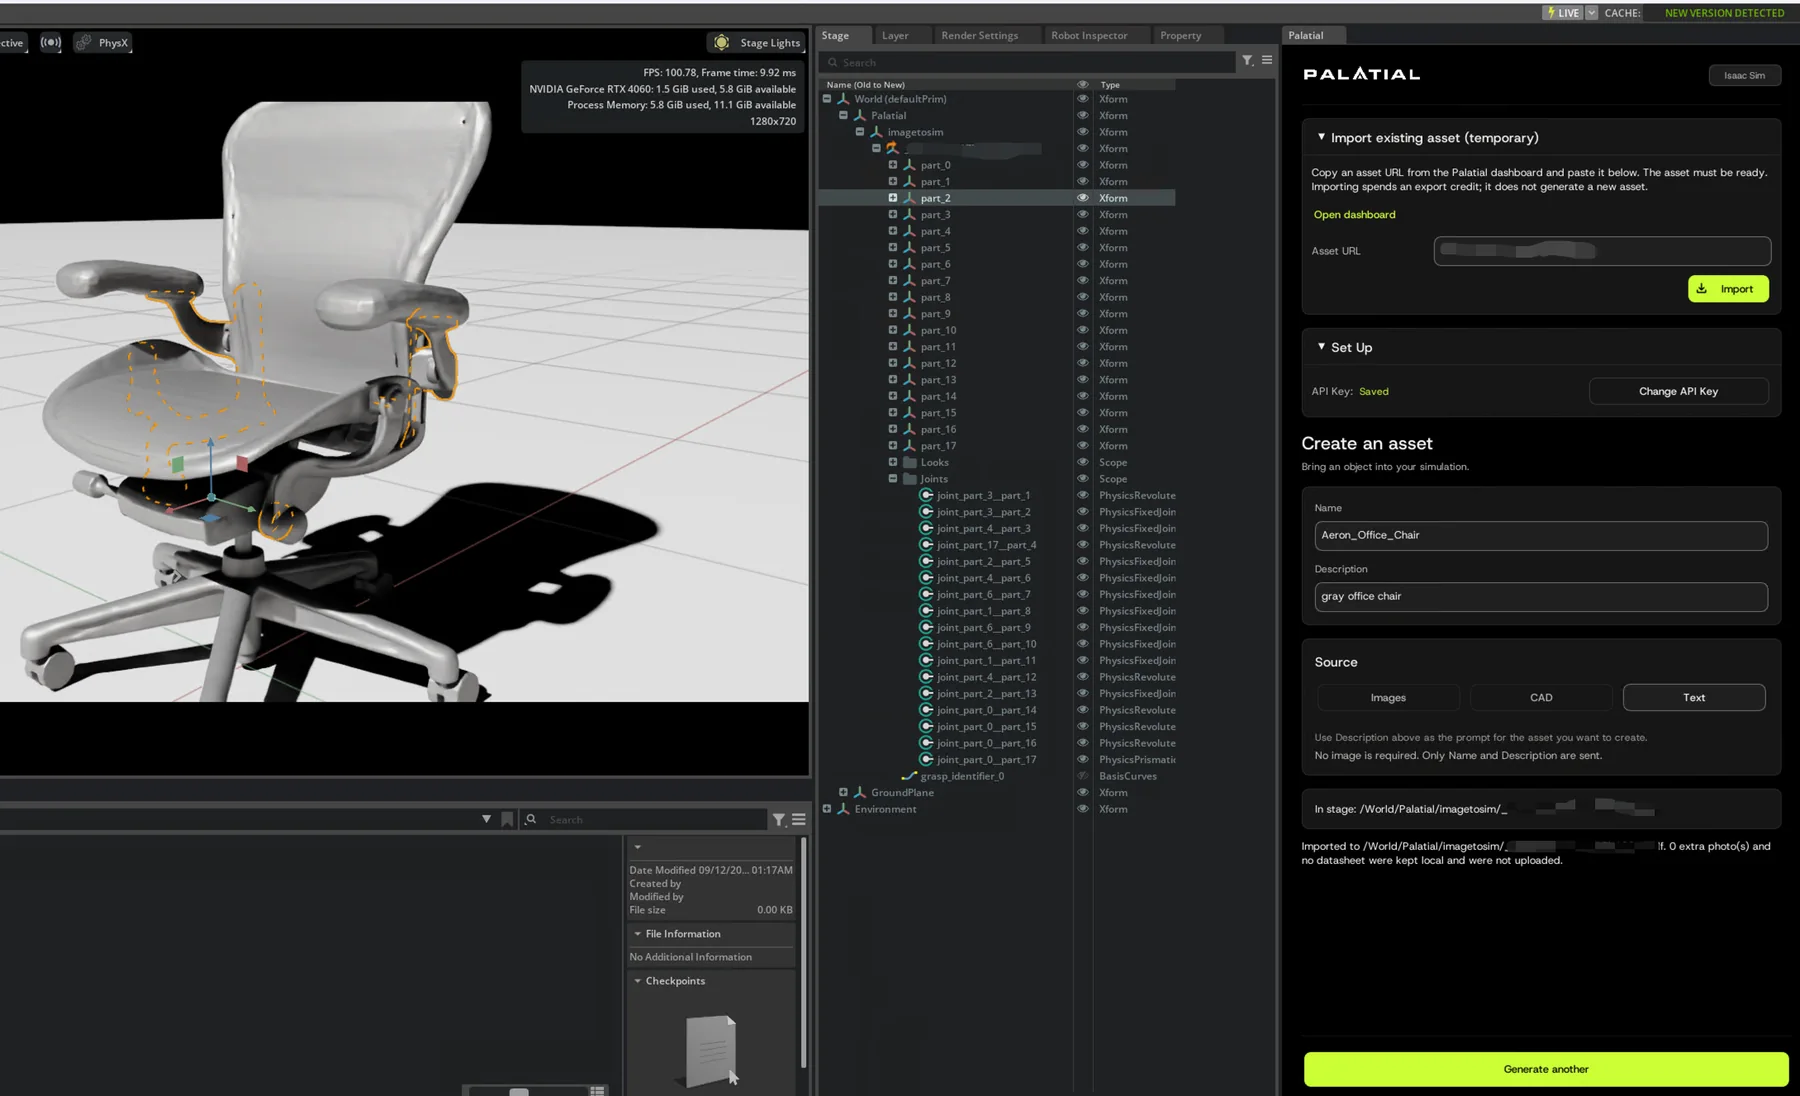
Section titled “Where the imported asset goes”The plugin adds a USD reference to the current Isaac Sim Stage under /World/Palatial/. Image jobs use /World/Palatial/imagetosim/; CAD jobs use /World/Palatial/cadtosim/. The asset ID identifies the child prim, with a leading underscore when needed for a valid USD name.
The imported package can include:
- visual geometry;
- materials and textures;
- collision geometry;
- joints and articulation data; and
- physical properties authored by Palatial.
The exact hierarchy and available properties depend on the exported asset. Import does not prove that every source material, joint, physical property, or validation requirement was preserved. The plugin rejects a duplicate at an existing target prim instead of overwriting it.
Troubleshooting
Section titled “Troubleshooting”The Palatial window is missing
Section titled “The Palatial window is missing”Open Window → Palatial. If Palatial does not appear in the Window menu, return to Window → Extensions, search for palatial.isaac.plugin, and confirm that the extension is enabled.
The ZIP is rejected during import
Section titled “The ZIP is rejected during import”Select the ZIP itself. Do not extract it before using Import Extension. Confirm that you downloaded the Windows x86_64 package and that it matches your Isaac Sim version.
The plugin says the API key is missing
Section titled “The plugin says the API key is missing”Open Set Up → Change API Key, paste a workspace API key, and save it. If the key was revoked, create a new key in workspace settings and replace the saved one.
Import cannot find the asset
Section titled “Import cannot find the asset”Confirm that the URL is a Palatial asset URL, that the asset has finished processing, and that the API key belongs to the workspace that owns the asset.
Generation is still processing
Section titled “Generation is still processing”Generation runs on Palatial’s servers and can continue after the plugin window closes. Check the dashboard for the current state. If a run failed or was canceled, review and correct the inputs before submitting another paid generation.
The asset is ready but download or import failed
Section titled “The asset is ready but download or import failed”Open a Stage if none is open, and check the plugin’s error details. For a ready asset with a local download or import failure, Retry download retries the import path without starting a new generation. An asset that is still processing, failed, or canceled must be resolved in the dashboard first.
The asset was already imported
Section titled “The asset was already imported”Find the existing prim under /World/Palatial/. The plugin does not overwrite it automatically.
CAD submission was interrupted and generation is disabled
Section titled “CAD submission was interrupted and generation is disabled”If the upload started but the plugin could not confirm an asset ID, it blocks another submission to avoid creating a duplicate paid job. Check the Palatial dashboard for the possible run before retrying; contact support if the state remains unresolved.
The model appears but parts or joints are missing
Section titled “The model appears but parts or joints are missing”Check that the original asset was generated with Separate rigid parts or Articulated parts. Single solid object intentionally does not request separate parts or articulation. Open the asset in the Palatial viewer to inspect its hierarchy and validation results.